Bloom
Neo4j Enterprise Studio has three tools built in, Query, Bloom, and Dashboards. All three of them allow you to interact with your data directly from the UI.
Bloom is a graph exploration tool for visually interacting with graph data. It allows you to explore your data without using Cypher®, you can visualize existing connections and create new ones directly from the UI.
Bloom is also built in to the Neo4j Aura console. The functionality is almost identical between the different deployments. This page is a brief introduction, for more information about this powerful tool, see Neo4j Aura → Bloom documentation.
In Enterprise Studio, you can find Bloom in the sidebar, under Tools.
Select your deployment via the dropdown and select your database from the database dropdown.
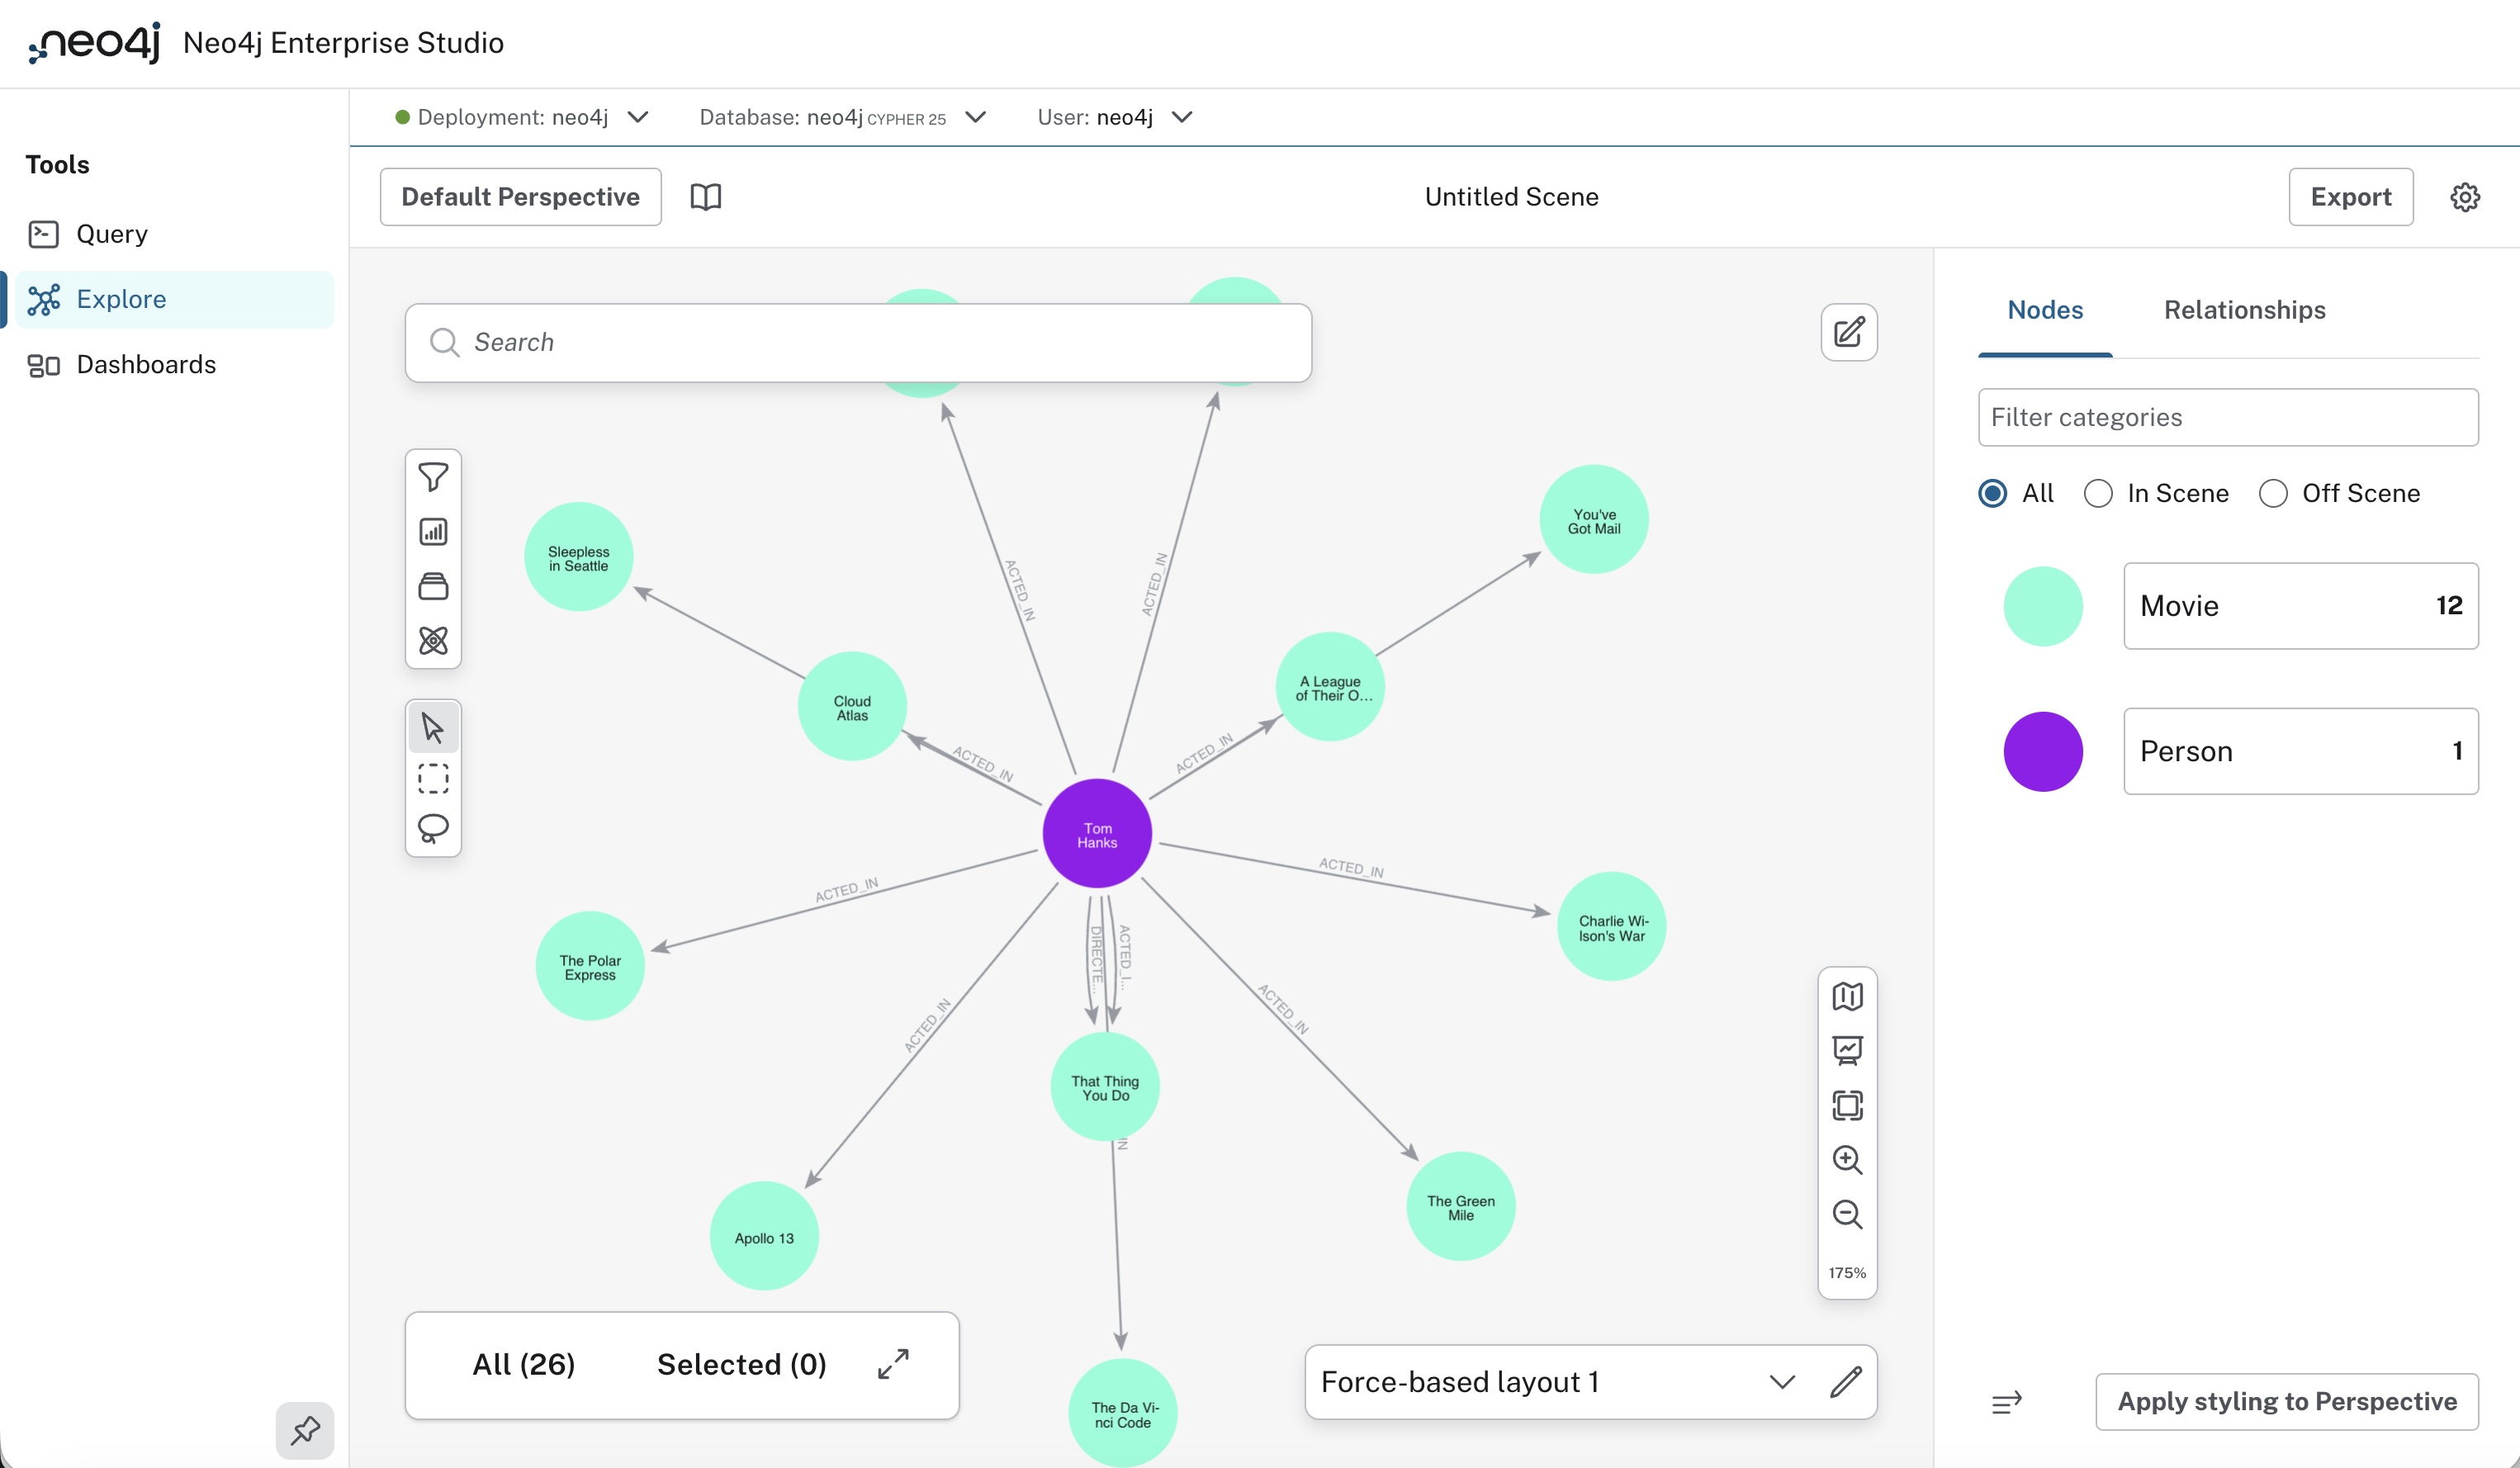
The UI consists of the Settings header, a search bar, the Scene, two vertical toolbars, a map, and a legend panel.
Settings header
The Settings header contains options for Perspectives and exports, as well as the settings drawer.

A Perspective is the context you explore with this tool. Instead of looking at all your data, you may be interested only in a part of it. Defining a Perspective is deciding which entities should comprise your explorations, and this is done in the Perspective drawer. See Bloom → Perspectives for detailed information about Perspectives.
You can export the data in the scene, either as CSV or as a screenshot.
The Settings drawer contains settings for the Bloom tool, such as the query limit and search timeout.
Search bar
Most data explorations in Bloom start in the search bar. This is where you describe what you are looking for and when you execute, you will see the results visualized in the Scene. Once you have elements in your Scene, you can interact with them in various ways. See Bloom → Search bar to learn more about the search bar.
Bloom co-pilot
When an administrator has configured an LLM provider for Enterprise Studio, users can use the Bloom co-pilot to turn a description written in natural language into a graph search pattern.
This feature appears only when generative AI is enabled. If you do not see it, ask your administrator; see Configuration → Generative AI.
Scene
The Scene is the main workspace in Bloom and this is where the graph based on your search is visualized. You can interact with the elements in your Scene in various ways, you can learn more about them, find hidden connections, edit them, and more. See Bloom → Scene interactions for more information.
Toolbars
The toolbars contain useful tools to help you interact with the data in your Scene. Which tools are available depends on whether you have a plugin installed in your instance or not. These are the available tools:
-
Filtering - Allows you to filter out elements in the current Scene.
-
Slicer - An interactive way to demonstrate differences in numerical values of properties via a timeline.
-
Scenes - A way of saving and sharing the Scene you’re currently working on.
-
Graph Data Science integration - Use an assortment of GDS algorithms on the data in your Scene. Requires the Neo4j Graph Data Science library to be installed on the connected deployment.
-
Marquee tools - The bottom of the two toolbars contains the individual select, the box select, and the lasso select. You can use these to select elements in the Scene, both nodes and relationships.
Map
The minimap of the Scene allows you to pan the entirety of your Scene. It has controls to change what is visible on the Scene and can help you navigate around your graph if your visualization is large. See Bloom → Map
Legend panel
On the right side of the Scene is the legend panel. It shows a list of all categories and relationship types available in the current Perspective and a list of which style they are rendered in. You can use this to select elements in the Scene, but also to control how they are visualized. You can change the size, color, and which property to display on the element. Additionally, the legend panel also offers rule-based styling. See Bloom → Legend panel to learn more about the legend panel.
Share scenes
You can share a Bloom scene with other users of the same Neo4j deployment. In Enterprise Studio you can share a scene with a specified database role, or you can share with other users of the database by their username.
The roles or users you share a scene with will see it in their Bloom tool once they have been added. If you want to revoke access from a role or user, you can do that from the same dialog, accessed via the Share button.
Migrate Perspectives and Scenes
If you use the Bloom plugin with Neo4j Desktop or standalone Bloom, you can migrate your Perspectives and any Scenes belonging to the Perspectives to the asset storage in Enterprise Studio.
This way, you can use Perspectives and Scenes you have created in Desktop or standalone Bloom, in Enterprise Studio.
Note that you need to be a studioAdmin in Enterprise Studio to perform the migration.
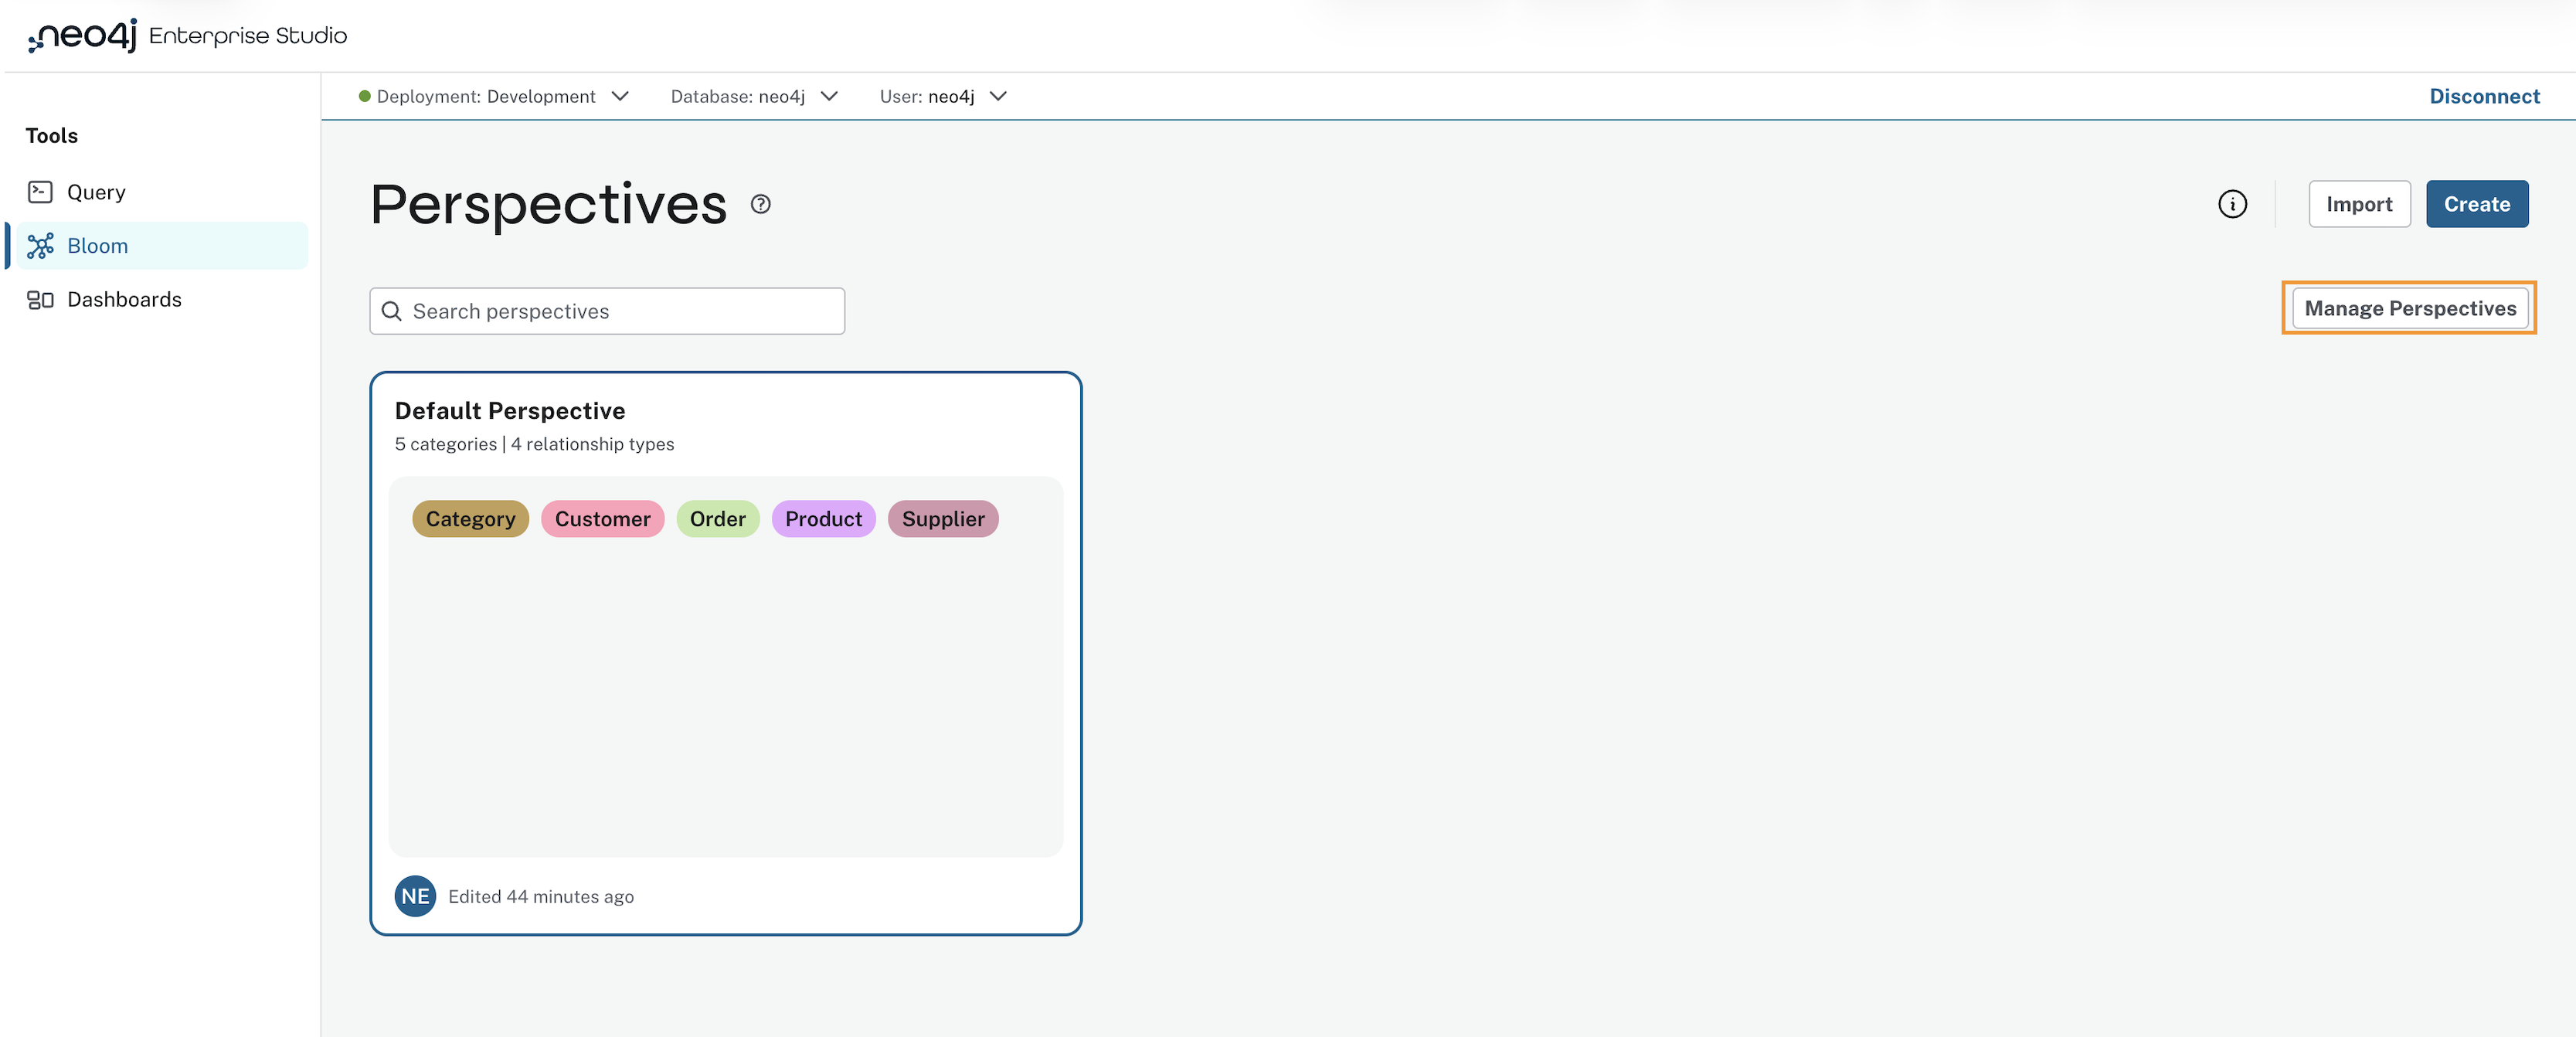
The migration is done from the Perspective gallery, located on the left of the Settings header. Use the Manage Perspectives button to access the available Perspectives. Select the Plugin tab and choose which Perspective(s) to migrate from the plugin.
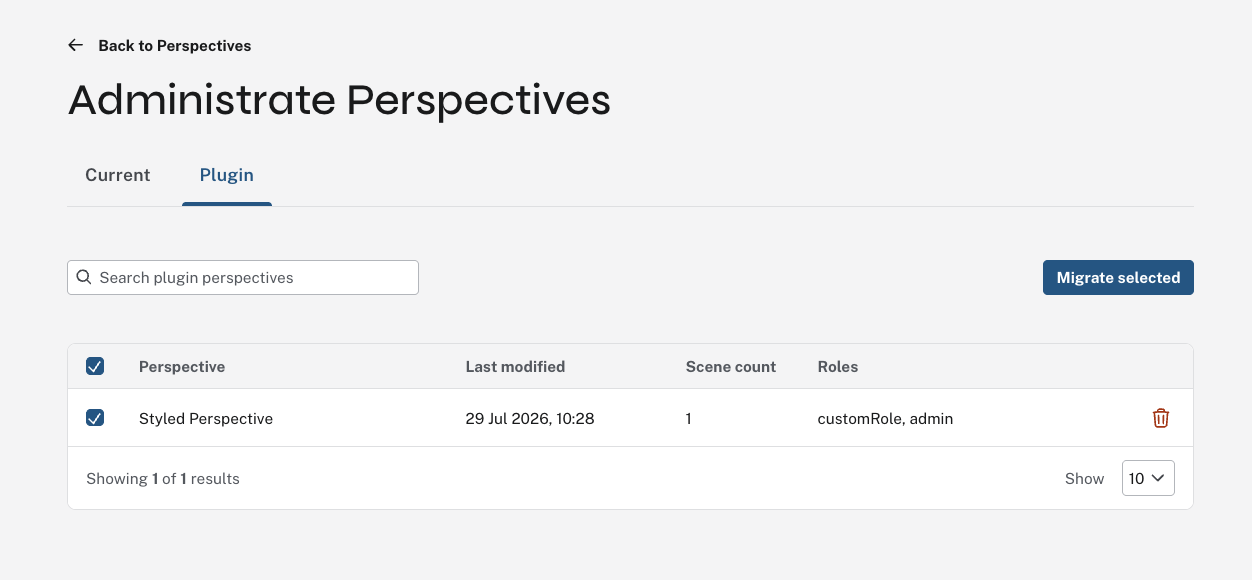
Use Migrate selected to continue.
The next step allows you to migrate any Scenes associated with the Perspective(s) by checking the Migrate Scenes box.
Additionally, if the Perspective is shared with any database roles on the plugin-side, you can opt to migrate this as well, to Enterprise Studio by checking the Keep group sharing box.
In that case, Enterprise Studio assigns the same roles and assign them as VIEWER of the Perspective/Scene.
This means that any users with access via their database roles, can view the Perspective (and Scenes), but not edit it.
The owner of the Perspective is the only user that can make any changes to the Perspective.
The next step allows you to assign ownership of the migrated Perspective and associated Scenes. If you migrate multiple Perspectives, ownership applies to all of them. Select which Enterprise Studio user should own the migrated Perspective(s).
If you have opted to migrate Scenes as well, this step allows you to select which Enterprise Studio user to assign the Scenes in each Perspective to. You can re-assign ownership to any listed user, it can be a different user than the Perspective owner. The list of migrated Scenes includes the plugin user who created the Scene(s). If that user exists as an Enterprise Studio user, they are preselected, otherwise the default is the owner of the associated Perspective. If a plugin user has created multiple Scenes, they must all be assigned to the same Enterprise Studio user.
The last step allows you to review the selections you have made and show Perspectives, Scenes, and their respective ownerships. Use the Back button if you need to change anything, or else Confirm migration to complete the migration.
If you want to change Perspective ownership after the migration, you can do so from the […] menu on the Perspective in the Current tab. You access this via the Manage perspectives button in the Perspective drawer.
Note that you cannot change the ownership of the Scene after the migration.
Another way of accessing Perspectives you have created in Desktop or standalone Bloom in Enterprise Studio, is to export them from their original location and then importing them in Enterprise Studio. For more information on how to do this, see Neo4j Aura → Migrate metadata → Perspectives. Note that exporting and importing a Perspective does not include associated Scenes.